Drawing background trees is a lesson into perspective that is done through adding layers. These layers give the illusion of distance, which in return makes your drawing look more realistic. So you want to know how to draw a forest background? Here are some great tutorial tips that make it easier for any drawing to look exciting and adds visual impact.
Drawing the Background of Distant Woods
Let's say you want to create a drawing that includes background trees. In this case, you want to have trees placed further back in the distance to show they are very far away. This is a cool trick that gives an added level of great distance and broadens the horizon point. In other words, the sense of scale is increased enough to fool the eye into thinking your picture is flat.
Many rules need addressing since you are making a picture that can be seen from the day or night. For the most part, light plays the most critical role in establishing how the tops of trees appear or how they may be backlit. You might also want to express a specific type of mood that evokes emotion. Since drawings can tell a story, too, you'll need to think about what you want others to see.
Mood
Are you looking to get an emotional impact from your drawing? Do you want someone to feel nervous or scared? Is there a calming effect that makes the background appear serene and beautiful? A drawing can help others see your emotion through the use of light and shadow. It heightens the senses to bring out a response that builds impact through human emotion. All the classic painters knew the steps of telling a story through their drawings and paintings.
Season
A forest can look different depending on the season that you choose. Spring and summer will look fuller, whereas fall and winter will be less dense and overtly sparse. These visual cues also directly relate to emotions and build the anticipation and message you might be trying to suggest. For example, snow-capped trees in the wintertime can look cheery but could also be interpreted as isolated.
Summer trees will all vary in shape and foliage, so knowing learning about tree types is essential. It will be essential to know what type of forest we are looking at. How they look according to the season you present will impact the final textures you will use in the end.
What is the time?
Give some clues as to the time of day (or night) for those who look at your picture. This helps establish a concrete reminder that certain hours of the day will mean something different for others emotionally. Early morning and dusk have different feelings than high noon or late night images do. If you want to create something cheerful, select a time that reminds you of that exact time. Always try to add emotion to build-up that visual impact.
Related Posts:
- How to Draw a Tree in Watercolor Pencils
- How to Draw a Tree in Pen and Ink
- 20 Ways to Draw a Sunset with Watercolor Pencils
- How to Draw a Night Sky: Using Colored Pencils
The Basic Principles of Drawing a Successful Background
These are the most fundamental rules of drawing any background. Even if you aren't a great artist yet, these rules are basic enough for anyone to understand. Getting started is all about setting the stage for your direct line of sight. In other words, what can you see immediately in the background? Here's all you need to know:
This is Not The Matrix
No matter what those crafty 3D animators tell you, scenes you see in the movies aren't three-dimensional animations. They are very creative mechanical drawings rendered on a computer. What helps make them appear real are the after-effects of layering, texture, and lighting. Your ability to create a 3D image is much more simplified since you want to begin with layers. These layers represent perspective, so you'll need to start with basic sketches.
These are often called thumbnail sketches and are rough outlines of what you want to have in your forest background. My best tip for you is to use tracing paper to outline different layers such as valleys, mountain ranges, or hills to add depth.
The Horizon is Your Guide
This tells you a lot about where you are looking and the meat and potatoes of any decent drawing. If you don't understand horizon lines just yet, it helps tell your viewers what the vantage point is. Are you looking at something from above the ground as if you're on a tall hill? Or are you looking from a lower elevation, such as a low valley looking up to the mountains?
Everything from that point remains hinged on that horizon line since this will later influence lighting and shadow. Anything closer to the frame needs to follow a natural line flow to that horizon line. Luckily, as trees are pretty free-form, these rules can be bent slightly as you will further read about.
Vanishing Point
All lines point to the horizon, so you'll have better luck creating laying effects by sticking to these vanishing point lines. Take a sheet of tracing paper and draw an exact copy of the horizon line. From that point, find a focal point where the viewer will center their eyes upon. This is your so-called vanishing point and is how you can create different layers of trees for your perspective.
Since you can use more than one tracing paper layer, find landscape angle lines that lead down to the vanishing point. Lines that are closer to the viewer will overlap previous lines that are intended for long distances. You can have at least 3 or more perspective layers that add trees to your picture, to be fair. What helps your forest background appear natural is using added layers of background trees that appear closer to the viewer.
Overlapping lines that wind down to or up to a vanishing point determine which direction you are looking. Are you looking up a mountain or down into the valley? What you draw next is to have ¼ to inch lines that radiate up or down to the vanishing point. Based on your horizon line, give yourself a reference frame so you can correct little perspective mistakes. This helps a lot for making layered landscaper angle lines.
The layers of the air
Although this information is probably going full-steam ahead, you will need to consider our atmosphere's effects. If you've ever seen anything in the distance, the fuzzier it looks. This is because the air is filled with all sorts of things. This includes dust, water, clouds, fog, and it all distorts anything further away from you. It will appear softer and lighter the farther away it is.
This is how your significant layers will create the illusion of depth. These layers will be more precise and sharper than the background. To get just the right look, this is why tracing paper is used for each added landscape layer. This also helps show you what works and what doesn't. Don't make the same mistake I did years ago and put it all on the same paper. Start with tracing paper and roughly add forest layers that can be mapped-out.
Should You Draw Your Background First?
In a heartbeat, yes- you should draw your background first. The reason is simple if you want to have a foreground object placed in later. This is all part of the layering process that was described earlier. If you skip to the foreground items first, you'll find that the perspective angles are not lining-up. The first rule of drawing backgrounds is to set that in motion, so you have horizon and vanishing lines.
If you try to cheat this rule, your picture will not look natural. You need to have a background that sets-up the perspective viewing point. This can further give you more freedom to create a visible path that you follow with your eyes to the vanishing point. I'm not saying there is a walking path, a yellow brick road, or a shortcut to Grandma's here! These are visual clues that tell you landscape layers are leading to the horizon focal point.
Drawing the Horizon Line
Let's start with a simple horizon line on your paper. Going back to the elevation you feel is best, are you looking up the hill or down the hill? Use the imaginary center line of your paper as a guide. How far above the center of the paper or below do you want to go? This line doesn't have to be straight either, so it can be slightly angled. This is so it will look more like there's an incline or decline.
Now grab a ruler and lightly draw the horizon line above or below the first line you've drawn. The horizon should be centered on the page as if you folded the paper in half. The lower the line is to the bottom of the paper indicates you are looking upward. The higher the line is will mean you are looking downward from a high point. The angled line that intersects with your horizon line is now the vanishing point.
All of the trees that you add in layers should follow a gradual decrease in size based on distance. If you are looking down for a high point, you will only see treetops. It will be more evident that lower angles will see more tree trunks. To make it simple at first, just have your tracing paper handy, so you can make vanishing point lines. This is mentioned in the vanishing point section of this tutorial.
With each layered landscape that is further away, you reduce the size of your trees accordingly. Lines that are the farthest away are only two lines tall (1/2 inch or so), while middle-sized trees are going to be twice as large. Of course, as these lines converge to the vanishing point, they must also shrink a bit. One tip is to look at the outer edge of the radius that's the widest and see how lines get smaller.
Now, if your trees were all lined-up like sitting ducks, it would be easy, right? This is why I recommend tracing paper layers that can be added to give the illusion of distance. The focal point will have little landscape lines that lead up to or down to the vanishing point. So essentially, you have larger trees gradually getting smaller along selectively layered paths.
Drawing Repeated Features
Just like Henry Ford was the master at making the assembly line work, your biggest job here is replicating trees. Trees in the distance aren't going to be as hard as the closer ones with detail. But you will be repeating a lot of the same steps. If you don't like drawing trees, this project will not be so much fun. Then again, the drudgery of drawing always has points that aren't always going to walk in the park.
Getting familiar with repeated objects gives you the experience to become more proficient at drawing. It becomes more of a secondary skill that you don't think about, which is what practice drawing entails. This is also an excellent task to test your ability at speed drawing. Quickly drawn 5-minute sketch ideas are very good at developing your sense of visual awareness. DaVinci and all the other maters often drew dozens of practice sketches first.
I can recommend making repetitive images to keep an open mind about what you are doing. This is precisely the kind of sample work that can be shown later to employers. They'll see the value of your dedication, and it might land a tidy paying job doing what you like.
Creating Space the Illusion of Distance
There is a reason that layers are best for adding in the background. The first reason is, so you have better control for smaller features. Layers of trees that progressively get closer to the viewer will allow you to fill empty sections of your drawing. The second reason is that the layered appearance of trees will have different values of shading. Distant trees will be lighter in the daytime due to the illusion of being further than they really are.
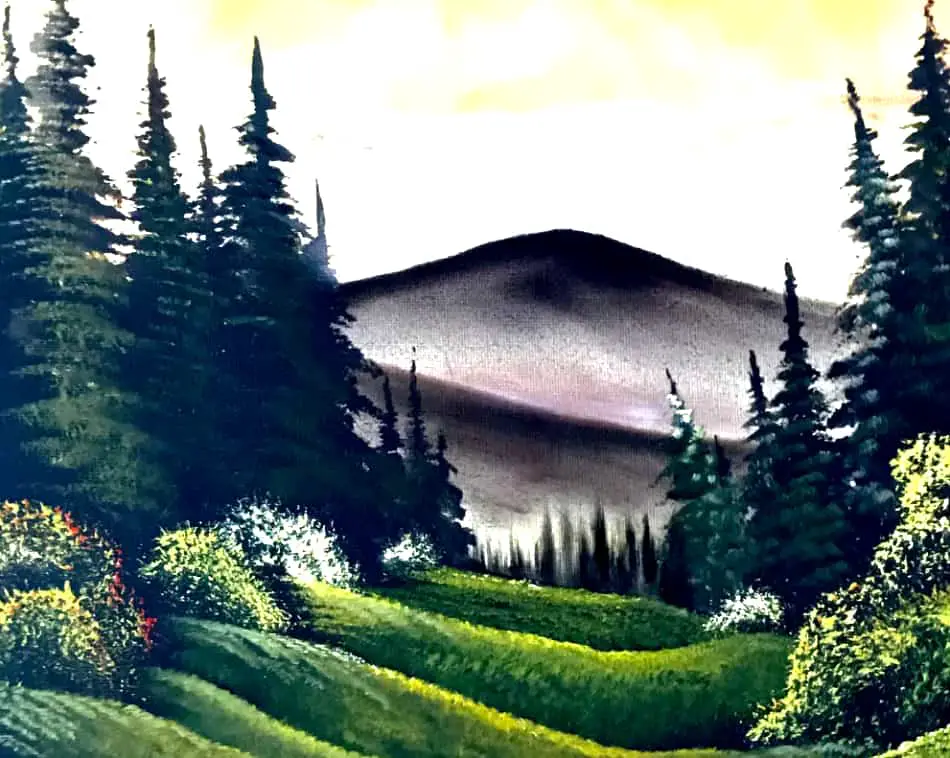
As any tutorial from Bob Ross will show you, distance creates a 3D look that's painted on a flat surface. His paintings often look like they stretch for miles into the background using shading and highlight tricks. Most of these tricks are accomplished by making them look softer in contrast to the foreground trees.
How Do You Draw a Background Tree?
Making trees look smaller is a big deal for creating a sense of scale. In this case, this is akin to building miniatures. It's not so much what you in the distance as long as it resembles something tree-like. What makes a tree appear more like a tree is highlighting that mimics light that bounces of tree trunks of foliage. These are not as defined as closer objects but are more blob-like splotches.
Imagine that you are looking at broccoli from a few feet away. The way that light bounces off the surface are exactly as you would imagine. This will have more fluffy and bulbous highlights than a detailed tree canopy. It will also depend on the tree type since fir trees look broken-up along the thinner outer branches.
Drawing a Distant Forest Using Using Aerial Perspective
When you are looking at things from above, the perspective might sound hard to reproduce. To get an idea of what aerial views of forests look like is just a matter of looking at internet photos. There are plenty of aerial photos of forests that you can download to get a useful reference. These pictures should be saved so you can use them later for light reference. The perspective comes from the angle of how the tree appears.
This will also come from your horizon line and vanishing point perspective. The more that you collect reference photos, the better control you can have for simulating distance. If you create various layers, this will have a more significant impact than just lumping together random tree groups.
Rendering Aerial Perspective to Create Depth
In art school, they don't get too much into topography design, which is essential for being a great architectural model maker. The first thing you learn in this type of work is how the ground's surface is measured and built up in layers. Higher points are smaller odd-shaped forms, while flatter leveled ground is much more subtle. A forest isn't always going to be flat ground, so you have to think about little hills and valleys.
How do trees stretch their way through these regions, and where are trees most likely to grow? This is an excellent way to create another kind of depth through simulating topography in your aerial perspective. Create the feeling of winding valleys and stretching sections of hills. This would be an excellent time to look at and collect pictures of mountain foothills for landscape reference.
The more you have in your collection will help you create all sorts of overhead forest images. These images always work on a psychological level giving us a look down instead of being on the ground. There is more beauty often seen by us from above than what we usually are allowed to see. You might say this is what is called the Heavenly View'.
Color Schemes For Your Background
It all comes down to the season that you want to recreate. Are you looking to capture the essence of spring or summer? There will be more vivid pops of color for fall weather, but not unless it applies to the part of the country you live in. There are also significant points regarding the time of day when you see how the sun reflects off the trees. Sunrise and sunset will have more orange tones than at high noon.
Collecting reference photos with these times of the year and times of day will help you determine a color scheme. I like to make small flashcard sized cardstock that gives me an exact color recipe. Depending on the season, these can be switched and exchanged to fit the mood. Or just having a good selection of colors will help you choose as you complete your picture. Just make sure to take notes and show samples of what colors you used.
Pretty soon, you'll have a whole collection of notes that are for drawing backgrounds. Just as these can be used for reference later, the task of grouping certain color combinations is just as vital. Show in a small section how these colors work using the dark shade first and then highlights. Use at least three colors in all. These can be modified later with lighter or darker shades. Don't be afraid to experiment with these color combos, either.
Drawing a Realistic Evergreen Forest Background
For the most part, a forest is going to be green, so the concept of evergreen is constant. The real trick to making an evergreen forest is using the colors in combination. Break up colors by making shaded areas first. A tree will be darker at the bottom of the trunk than towards the top. Highlights should also grow lighter toward the top. This is not always the case, as the sun's angle might only catch a tree from the side.
Sunsets and morning light will not give evergreen trees justice but produce more orangey-yellow highlights over green foliage. The closer a tree is, the more detailed foliage can appear. Further, trees can fade away softly by rubbing down the picture using a blender stick. Using color pencils, you might try using a paper towel to rub down detail, so it appears softer, and go back with minor corrections.
Just remember that the softer the image appears, the more-dreamy the image tends to become. This can work on many levels, but the real trick is to keep some elements in sharper focus. This keeps the viewer attached to your vision but doesn't make them feel disillusioned. Always find the mood you want to create before settling on evergreen forest pictures. This is another thing they don't teach you in drawing school.
How to Draw a Dark Forest Background
For this trick, you need to be a little creative in creating a dark forest atmosphere. Your best bet is using blue and purple to simulate distant highlights. Never use white to make a dark forest look real. Various shades of dark greens and olives make fantastic foliage, while brown and navy blue are good for foliage shadows. It's not until you get into a possible light source that light blue, purple are mossy green are excellent reflective colors.
These can help simulate the look of moonlight cascading through the upper foliage of the trees. It's better when this light is broken-up and spare small light beams of light rather than a large open patch. You don't want people to think that a UFO is landing in the middle of the forest. Always think of uniformity over a large amount of space to distribute light sparingly. There is always going to be the issue of where the light is also angled.
Is the light coming from the side of the frame directly from an overhead source? If you want to be mysterious, this might not need an explanation but don't go overboard unless you're looking for a ghost-like theme. Not everyone responds well to dark forest pictures so sticking with natural lighting is always a plus. Then again, you might be inspired to recreate the shades that come from the northern lights.
This would look especially beautiful for winter forests at night and give snowdrift slopes in the forest a magical quality. You might also decide to add small fireflies that give more whimsical or memories of the past feeling to a dark forest background.
How Do You Draw a Background Tree?
Unlike the cameras that we have today, older style SLR cameras that used film inside them required manual focus. These required setting the ASA and setting a focus range. The advantage to cameras like this was to captures images that were in focus in the foreground. Anything that was in the background was a blur or out-of-focus. Depending on your shooting-style' as they used to say back then, you could give varying degrees of background focus.
So the answer is not so easy to explain how to draw a forest background. It all depends on the focus you want for the foreground. Are trees in the background in sharp focus, or are they blurry blobs of random greens and yellows. This is where you can start to develop your shooting-style' when it comes to drawing a forest background. The more you practice, the better the results will be. Good luck!